The Sandbeck's have officially started the Elf On The Shelf tradition!! I'm so excited to start this new tradition with the kids. They were so excited to get him. His name is Bilbo and has found a comfy spot on our Christmas tree.... At least for now ;-) Can't wait to see what things Bilbo will be doing around the house this Christmas!
Sunday, December 2, 2012
2012 Jingle Bell Craft Fair
Here is a few craft items I made for the Jingle Bell Boutique craft fair. This is my second year participating and I have so much fun! Hopefully next year I can do a few more!
I used Starbucks Bottles and decorated them then filled them with chocolate Tootsie Rolls and Vanilla Tootsie Rolls.
These are the hot apple cider sliders
The Snowman Hershey Bars
Last year I found some Christmas tissue so I thought I'd just decorate them up for a cute stocking stuffer.
These are Rudolph's Spares. I had small plastic pillow boxes that I ran through my cuttle bug to emboss them with my snowflake folder, then filled them with Red Hots.
Magic reindeer food. These were a big hit this year and last! Super cute!!
Pencil Packs
Skinny notepads
These are the individual snowman soup kits.
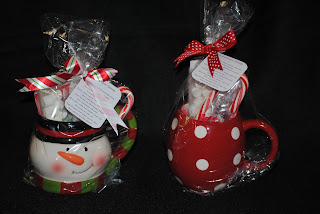
Snowman soup gift mugs.
I made a snowman soup kit with a set of the Starbucks coffee bottles. It's enough for about 6 snowman soups.
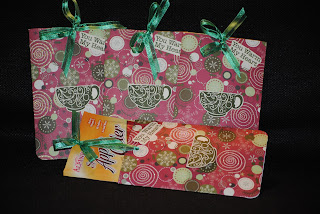
Tea and treat holder
Jumbo clothes pin picture holders and binder clip picture holders
My table and shelf at the craft fair
I'll be posting my extra crafts from the fair on my Etsy shop so be sure to check that out!
Santa List Ornament
For this months Macaroni Kid craft, I put together a Santa list keepsake ornament. To learn how to make this project be sure to subscribe to Macaroni Kid Kitsap. The article will run on Friday, December 7, 2012.
Thursday, November 1, 2012
Kids Halloween Magic Potions Lunch

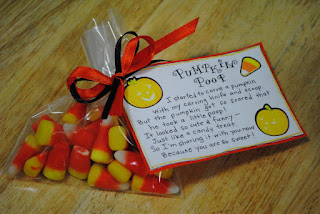
I like to make the kids special lunches on holidays and birthdays, so this year I decided to use the CTMH Magic Potions stamp set to make a "Spooky" lunch for them. I used grapes for the owl eyes, a bag of sour cream and onion chips for the pickled toad, Crystal Light Juice for the commotion potion. I also added some pumpkin poop and attached a poem to the bag. For their sandwiches I used a pumpkin cookie cutter to cut out a pumpkin shape on the top bread of the sandwich. The sandwich was ham and cheese, so I just made sure the cheese was on top so that the pumpkin would be orange. The kids loved it... It was the first thing they told me about when they got home from school! The stamp set I used can be purchased HERE on my website.
For the pumpkin poop tag, I found it at Happy Home Fairy. Click the link to get your free pumpkin poop printable.
Hope you all had a great Halloween!
Love The Sandbecks
Tuesday, October 2, 2012
Bracket Frame
I've had this bracket frame for a while but wasn't sure what I wanted to do with it. I remembered my mom's birthday is coming up, so I thought I'd put something together for her. I used the my creations bracket frame and used the flirty papers to cover it. I placed glue on the front of the frame and placed it on the floral sheet of the flirty papers. I then used my exacto knife to cut it out. I then took a sheet of the poster board and cut it to a 9x9 square and glued a 9x9 piece of the flirty paper to that piece for the back of the frame. I used the solid color cardstock to make the paper flowers. I used the 3D paper flower cut out from the Art Philosophy cartridge. I used that cartridge also to make the leaves and the butterfly. I used the stamp set Love Blooms and stamped the outline of the flower in Desert Sand ink and stamped the color of the flower in Honey. I used the swirly pearls and pins for some accents. I added a 4x6 picture of my sisters and I and cut the Raspberry colored cardstock about 1/8 longer for a photo mat.
Halloween Treat Box
Sunday, September 30, 2012
Team Spirit Studio J Layout
I just wanted to share this Studio J layout I made of my son and my youngest daughter. I loved how the pictures came out! It's his first year playing football and my little one gets to be the team cheer leader... She gets so excited when it's game days because she gets to wear her uniform.
Friday, September 14, 2012
Studio J
My first Studio J layout! I was surprised with how easy it was to create layouts with the digital scrapbooking program. I have a hard time when it comes to dealing with anything digital but I had a lot of fun creating a few new layouts :) Be sure to check out the Studio J website to create your layouts. It's free to create an account and upload your pictures to play around with the different layouts that are offered. You can even save them to purchase when your ready!
CTMH Stamp of the month: Fall Favorites
I just love the CTMH stamp of the month for September, Fall Favorites. I used it to put together a little paint bucket for a swap. I'll probably but some little goodies in them but I just loved how they turned out :) You can get this stamp of the month for $5 with a qualifying purchase of $50 or more. Click HERE for my Close To My Heart website.

Friday, September 7, 2012
Back To School Fairy

This year I wanted to do something a little special my kids since this year my baby will be starting her first year of preschool! I wanted to try and start a new tradition for the Sandbeck kids :) I'm a Pinterest addict!... And I saw a pin about a "Back To School Fairy" and I just fell in love with the idea. I love the idea of getting the kids excited about starting a brand new year of school. So I put together some goodies to get the kids excited about their first day in a brand new grade.

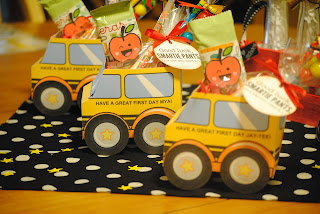
I just love, love, love! These little school bus boxes I purchased from Paper Glitter. You can even personalize a little message on the sides of the bus. She sends you a file to download and you can print out however many you need! Very handy and very easy to put together :) Click HERE for the link to her Etsy shop.
I filled the buses with a fruit roll-up ( I covered it with scrapbook paper) , a gumball stick, a pack of Smarties, and some pencils.
I found this tag on a site that I thought would be cute if I attached them to the Smarties. You can get this printable tag for free. Click HERE to print yours.
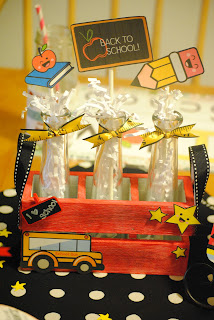
This 3 mini vase holder I purchased about a year ago at Safeway in the floral department. It as originally white but I just painted it red and covered the handles with some ribbon. I also tied some ruler ribbon around the tops of the vases and filled them with some white shredded paper. I attached some school cutouts that I purchased from Paper Glitter on long lollipop sticks and stuck them in the vases. The cutouts on the vase holder is also from the collage sheets for Paper Glitter. Click HERE for her Etsy shop.
This is a mini clipboard I had made and I thought it would be perfect to use to hold the note I had created from the Back To School Fairy. I used my Storybook Creator to make the note. The poem on the note reads:
Today you hurry off to school
To work and learn and play.
You're in a brand new grade
This year. What a happy day!
The Back To School Fairy
I made these place mats with scrapbook paper and laminated them. I used some Starbucks coffee bottles and covered them with some coordinating scrapbook paper. The paper straws I got from Michaels.
The kids were so happy to see what the "Back To School Fairy" had done! This is my Son Jay-Tee enjoying his breakfast.
My oldest Kaleia. She says she'd like the Back To School Fairy to visit every year!
My Baby Mya! She actually doesn't start preschool till the 24th but I couldn't leave her out... So she just celebrated a little early ;)
This is another idea that I found on Pinterest. I've always taken pictures of them on their first day but I never had them take a picture with what grade they would be entering in that year. I thought it was a fantastic idea! I found these free printable grade sheets. Click HERE to get your free grade sheet!
Ready for a brand new year!!!
Subscribe to:
Posts (Atom)


